Adding Android data from local storage
To start working with local Android backups:
1.In the Backups Library pane, click the Acquire data for Android device icon ![]() .
.
2.In the opened menu, click the Load from local storage icon ![]() .
.
3.In the opened window, specify the path to the com.whatsapp_preferences.xml (for WhatsApp) or com.whatsapp.w4b_preferences.xml (for WhatsApp Business) file in the Path to data files field.
Specify the path to the Media folder in the Path to media files field.
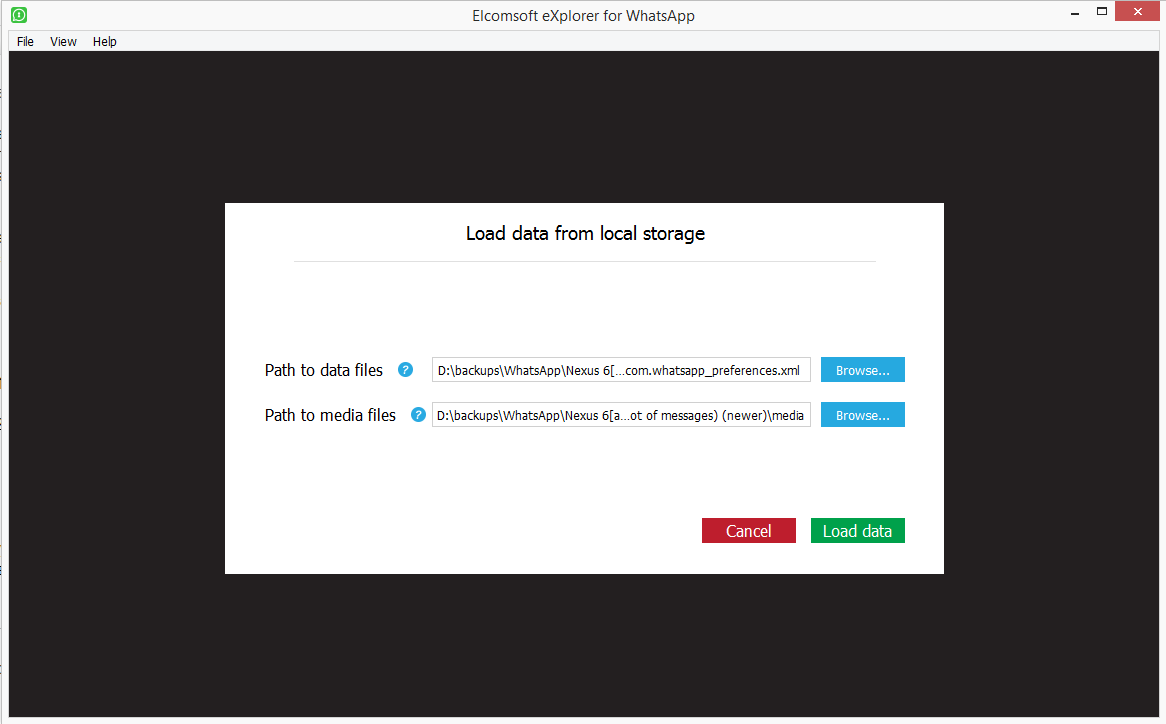
4.Click Load data.
5.Once the backup is loaded, the following device information is displayed:
•Phone number
•Product type (Android version)
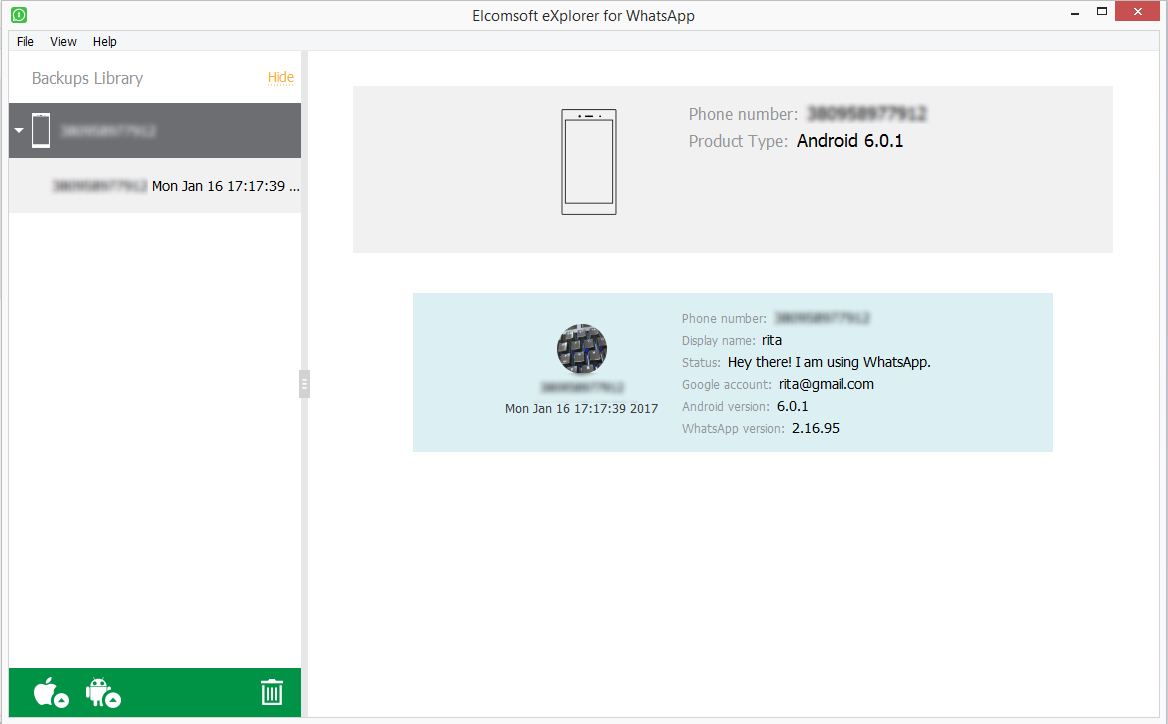
The lower part of the window displays the userpic, phone number, and the backup date (according to the time zone and date format defined on the local PC) as well as the following WhatsApp information (some of it may not be available):
•Phone number
•Display name
•Status
•Google account
•Android version
•WhatsApp version
Viewing data
When you select the target WhatsApp backup in the Backups Library to the left, the lower part of the window shows all plugins available (some of them might be disabled if there is no appropriate information in backup):
•Account info (WhatsApp Business only)
Click the plugin icon to view the contents.
Exporting data
EXWA allows you to export data from a backup to your PC. Data is exported to an XLSX file, and all attachments/files are saved to a folder in the same location as the XLSX file.
Please note that data export is only available in the registered version of the program.
To export data, do the following:
1. In the Data View pane, click Export data.
2. Select the data categories to export.
3. Define the time interval for which you want to export data as follows: enable filters by switching the On/Off toggle and then select the dates in the From and Until fields.
4. Click Export.
5. The window will open in which you can select the location for exported data.
6. Once you select the location, click Save.
7. Data export will start.
8. To open exported data, click the icon next to the Data has been exported message highlighted in yellow or open it from the location to which it was saved.